Payment Links Guide
Generate shareable payment links to accept payments anywhere, not just inside Discord.
Table of Contents
Overview
Payment links allow you to accept payments for your Discord memberships outside of Discord. Share links on your website, social media profiles, email campaigns, or anywhere your audience is. Read about how this feature was developed →
What's the difference?
- Discord /subscription command: Users must be in your Discord server first
- Payment links: Anyone can pay from anywhere, then join Discord automatically
Two Types of Links
🔗 Direct Tier Links
Link to a specific membership tier. Perfect for:
- Website "Subscribe" buttons
- Social media bios
- Email campaigns
go.paybotapp.com/aB3xK9pL/xY7mN2🌐 Portal Page
Shows all your membership tiers on one page. Perfect for:
- Link-in-bio tools (Linktree)
- Main website landing page
- Community homepage
go.paybotapp.com/aB3xK9pLPrerequisites
Before generating payment links, ensure you have:
Stripe Connected
Complete the PayBot setup to connect your Stripe account.
Any PayBot Plan
Payment links are available on all plans, including Free.
Active Tiers
Create at least one membership tier before generating links.
Free for everyone: Payment links are included on all PayBot plans. No upgrade required!
Step 1: Enable Payment Links
First-time setup to activate payment links for your server.
Run /setup Command
In your Discord server, type /setup to open the admin dashboard.
/setupClick "Enable Payment Links"
You'll see a button labeled "Enable Payment Links" in the setup menu. Click it to begin the one-time setup.
What happens: PayBot will generate a unique portal code for your server and create a permanent invite link.
Portal Created!
You'll receive a confirmation message with your portal URL (e.g., go.paybotapp.com/aB3xK9pL).
Note: This is a one-time setup. Your portal code is permanent and won't change.
Bot Permissions Required
PayBot needs the "Create Instant Invite" permission to generate your Discord invite link. If you see an error, grant this permission to PayBot's role.
Step 2: Generate Payment Link for a Tier
Create a payment link for each membership tier you want to share outside Discord.
Navigate to Tier Settings
In /setup, click "Manage Pricing" to view your membership tiers.
Select Your Tier
Choose the tier you want to create a link for. You'll see the tier details and action buttons.
Click "Generate Payment Link" or "Copy Payment Link"
First time: Button says "Generate Payment Link"
After generation: Button says "Copy Payment Link"
What you'll receive:
- Direct tier link: Takes users directly to this tier's checkout
- Portal link: Your main page showing all tiers
View and Test Your Link
Two buttons appear:
- "View This Link": Opens your tier-specific payment page
- "View Portal": Opens your portal showing all tiers
Click these to preview what your users will see!
Link Format
https://go.paybotapp.com/{portal_code}/{tier_code}Example: https://go.paybotapp.com/aB3xK9pL/xY7mN2
- portal_code (8 characters): Unique to your server
- tier_code (8 characters): Unique to each membership tier
Managing Your Portal
Control which tiers appear on your public portal page and in what order.
Access Portal Management
In /setup, click "Manage Payment Links"
You'll see all your payment links with visibility controls
Portal Settings
🔍 Show/Hide Tiers
Control which tiers appear on your public portal page.
- Visible: Shows on portal page
- Hidden: Direct link still works, but doesn't appear on portal
Use case: Hide early-bird or exclusive tiers while keeping the direct link shareable.
🔢 Reorder Tiers
Change the order tiers appear on your portal page.
- Move tiers up or down
- Highlight your most popular tier first
- Create a logical progression
Tip: Put your main offering first to increase conversions.
Portal Theme
Customize the appearance of your portal page with 8 color themes. Access theme settings from Portal Settings → "Change Theme".
Available themes: Choose from 8 built-in color options to match your brand. The theme applies to your entire portal page including headers, buttons, and pricing cards.
How Payment Links Work
Understanding the complete user flow from link click to Discord access.
User Payment Flow
Visitor clicks your payment link from any source (website, Twitter, etc.)
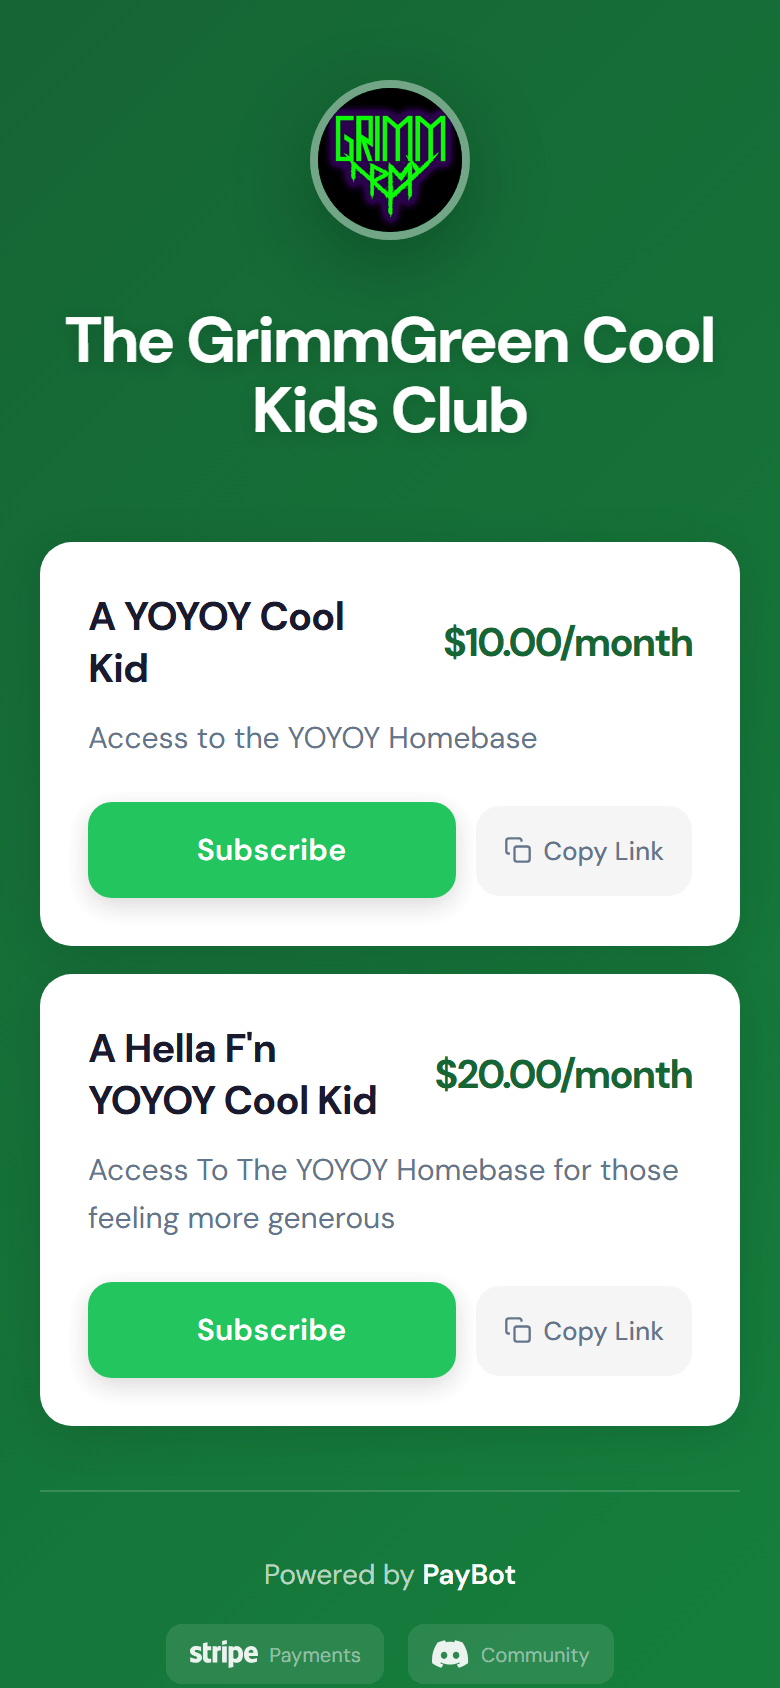
Beautiful branded page shows: Server icon, tier name, price, and benefits
User clicks "Login with Discord" → Quick OAuth (2 clicks)
Secure Stripe checkout page opens with tier details pre-filled
Success page with "Join Discord Server" button appears
When user joins Discord, PayBot assigns their role within seconds
Scenario: User already in Discord
If the user is already a member of your Discord server, their role is assigned immediately after payment—no need to join again!
Scenario: User pays but doesn't join
Their subscription remains active. When they eventually join your Discord, PayBot automatically grants their role using the pending role system.
Best Practices
Get the most out of payment links with these proven strategies.
✅ Do These Things
- Use descriptive tier names - "Premium Access" is better than "Tier 1"
- Add clear tier descriptions - Explain what subscribers get
- Test your links - Click through the full flow before sharing publicly
- Share portal link in bio tools - Let users browse all tiers
- Use direct links for targeted campaigns - Drive to specific tiers
- Monitor analytics - Track page views, tier clicks, and conversions via Link in Bio Analytics
- Update tier descriptions regularly - Keep benefits current
❌ Avoid These Mistakes
- Don't share broken links - Always test after tier changes
- Don't use confusing tier names - Be clear about what users get
- Don't hide your main tier - Make your best offer visible
- Don't forget Discord permissions - Ensure PayBot can assign roles
- Don't archive tiers with active links - Users will see error messages
Optimization Tips
A/B Test Placement
Try different locations on your website to see what converts best. Header vs. footer vs. sidebar.
Track Sources
Use different links for different campaigns to see which sources drive subscriptions.
Social Proof
Mention subscriber count or testimonials near your payment link to increase trust.
Clear CTAs
Use action-oriented button text: "Join Premium" instead of just "Click Here".
Troubleshooting
Common issues and how to fix them.
❓ "Enable Payment Links" button not showing
Cause: Stripe isn't connected yet
Solution: Complete the initial setup to connect your Stripe account first
❓ "Generate Payment Link" button is grayed out
Possible causes:
- Tier is archived — unarchive it first
- Stripe connection issue — try reconnecting in
/setup
❓ Portal code generated but direct link not working
Cause: You need to generate individual tier links
Solution: Go to each tier and click "Generate Payment Link" separately
❓ User paid but didn't get role
Possible causes:
- User not in server yet: Role will be granted when they join
- Bot permissions: Ensure PayBot has "Manage Roles" permission
- Role hierarchy: PayBot's role must be above the member role
Solution: Run /audit-roles to manually check and assign pending roles
❓ Error creating invite link
Cause: PayBot doesn't have "Create Instant Invite" permission
Solution:
- Go to Server Settings → Roles
- Find PayBot's role
- Enable "Create Instant Invite" permission
- Try enabling payment links again
❓ Want to regenerate portal code
Note: Portal codes are permanent and cannot be changed
Why: Changing codes would break all existing shared links
Workaround: Individual tier codes can be regenerated by archiving and recreating the tier
Still need help? Join our support Discord for assistance.