Creating Membership Tiers
Learn how to create recurring and one-time payment options for your Discord server
Table of Contents
Recurring Membership Tiers
Recurring tiers are the foundation of most Discord server monetization strategies. Members pay monthly or yearly for ongoing access to premium features and roles.
Access the Creation Modal
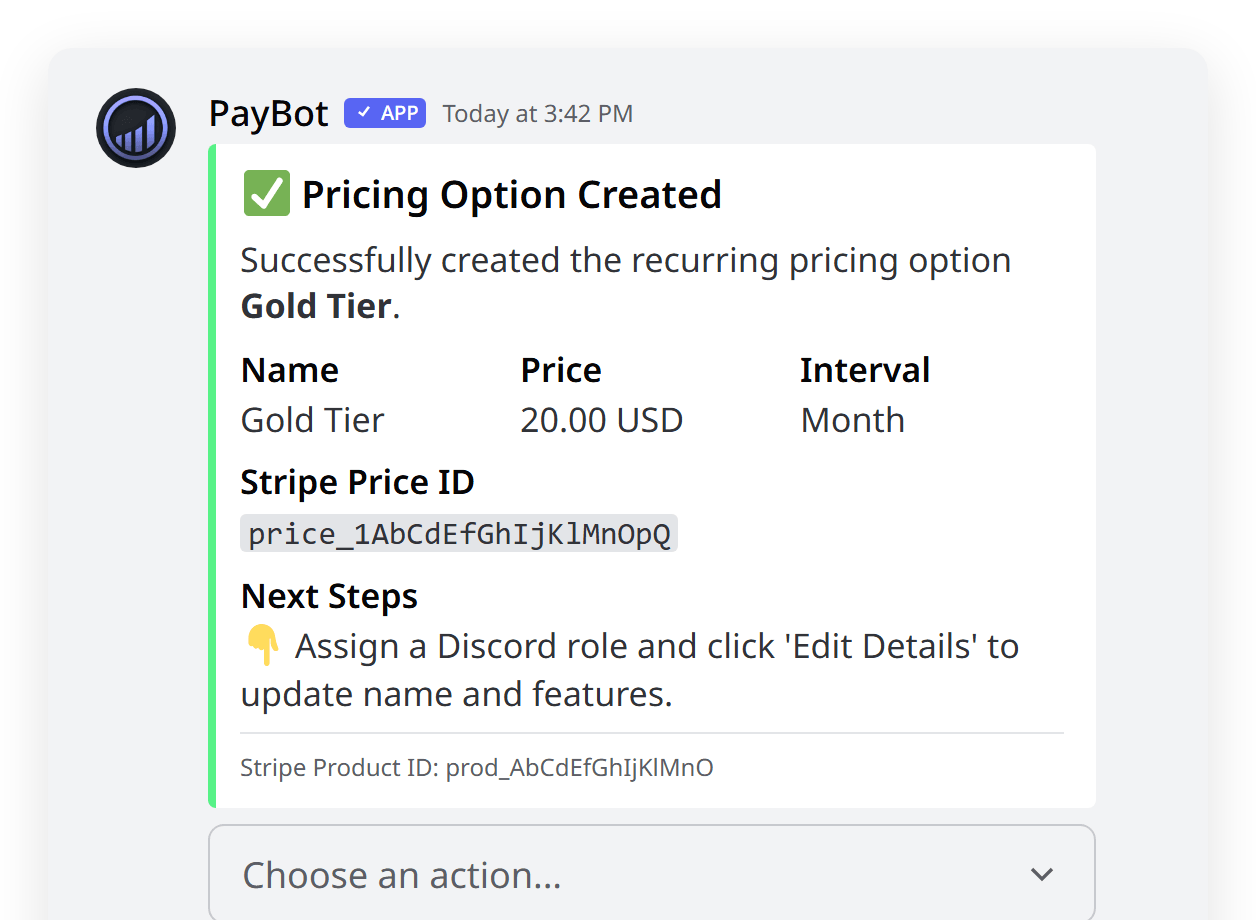
In your Discord server, use the /setup command and click "Add Recurring" to open the membership creation modal.
/setup → Add Recurring → Fill out the modal formConfigure Basic Details
Product Name
This becomes the Stripe Product name and is visible to customers during checkout.
Good examples: "Premium Member", "VIP Access", "Gold Tier", "Server Booster"
Description (Optional)
Brief description that appears in Stripe and helps customers understand the value.
Example: "Access to exclusive channels, priority support, and special member-only events"
Set Pricing
Price Setting Guidelines
- Start low: $2-5/month for basic tiers, $5-15 for premium tiers
- Consider value: Price should reflect the exclusive benefits provided
- Test first: Start with lower prices and increase based on demand
- Be transparent: Clearly communicate what members get for their money
Choose Billing Interval
Select between monthly or yearly billing cycles. Most servers use monthly billing for flexibility.
Monthly Billing
- ✅ Lower barrier to entry
- ✅ Easier for members to cancel if needed
- ✅ More predictable monthly revenue
- ❌ Higher Stripe fees per transaction
Yearly Billing
- ✅ Lower Stripe fees overall
- ✅ More stable long-term revenue
- ✅ Members show stronger commitment
- ❌ Higher upfront cost for members
One-Time Payment Options
One-time payments are perfect for special events, merchandise, or premium content that doesn't require ongoing subscriptions.
⚠️ Large Plan Required
One-time payment options are only available on the Large plan ($89/month). If you're on the Free or Small plan, you'll need to upgrade first.
Common Use Cases
Event Tickets
Sell tickets to special events, tournaments, or exclusive meetups
Digital Products
Sell custom emotes, artwork, guides, or other digital content
Premium Features
One-time access to premium features or temporary role upgrades
Donations
Accept one-time donations with special recognition or temporary benefits
Pricing Configuration
Understanding how to set up effective pricing strategies for your Discord community.
🏷️ Value-Based Pricing
Price tiers based on the perceived value and exclusivity of benefits.
Example Structure:
- $3/month: Access to member-only channels + basic role
- $7/month: Previous tier + priority support + exclusive emotes
- $15/month: Previous tiers + early access to events + custom role color
📊 Tiered Access Model
Create multiple tiers with increasing levels of access and exclusivity.
Progressive Benefits:
- Bronze ($5): Basic exclusive channels
- Silver ($10): Bronze + priority support
- Gold ($20): Silver + custom role + early access
- Platinum ($50): Gold + personal coaching
🎯 Niche Specialization
Target specific community interests with specialized pricing.
Specialized Tiers:
- Gaming: Tournament access, coaching sessions
- Creative: Portfolio reviews, collaboration opportunities
- Professional: Networking events, industry insights
Currency Support
PayBot supports 150+ currencies worldwide, making it easy to accept payments from your global community.
Popular Currencies
Smart Currency Input
PayBot understands multiple ways to specify currencies:
- 3-Letter Codes:
USD,EUR,GBP - Common Names:
US Dollar,Euro,Pound - Abbreviations:
usd,eur,pound
Important Notes
- Currency must be supported by your Stripe account's country/region
- Some currencies may have minimum amount requirements
- Exchange rates are handled automatically by Stripe
- Choose currencies that match your target audience's location
Role Assignment
Automatic role assignment is one of PayBot's most powerful features. Here's how to set it up correctly.
Create Discord Roles First
Before creating membership tiers in PayBot, create the corresponding roles in Discord:
- Go to Server Settings > Roles
- Click "Create Role" for each membership tier
- Name roles clearly (e.g., "Premium Member", "VIP", "Gold Tier")
- Set appropriate permissions for each role
Assign Roles in PayBot
After creating a membership tier, assign Discord roles:
- In
/setup, find your newly created tier - Click "Edit" on the tier
- Click "Assign Role" or "Change Role"
- Select one or more Discord roles from the paginated list
Multiple roles per tier: You can assign multiple Discord roles to a single tier. Subscribers receive all assigned roles when they subscribe.
Set Up Role Hierarchy
Critical: PayBot's role must be positioned above membership roles in Discord's role hierarchy.
If PayBot cannot assign roles due to hierarchy issues, members won't receive their purchased benefits.
Benefits of Automatic Role Assignment
Instant Access
Members get their roles immediately after successful payment
Automatic Cleanup
Roles are removed when subscriptions are cancelled
Precise Control
Each tier can have its own specific role and permissions
Easy Management
No manual role assignment required - everything is automated
Editing & Managing Tiers
Learn how to modify existing membership tiers, update pricing, and manage your offerings.
Access Tier Management
Use /setup and click "Manage Pricing" to see all your active membership tiers.
Edit Tier Details
Click "Edit" on any tier to modify:
- Name & Description: Update the tier name and benefits description
- Role Assignment: Change or remove the assigned Discord role
- Archive Tier: Hide the tier from new subscribers (existing subscribers unaffected)
Archive vs Delete
Archive (Recommended)
- ✅ Hides tier from new subscribers
- ✅ Existing subscribers keep access
- ✅ Can be unarchived later
- ✅ Stripe product remains active
Delete (Not Recommended)
- ❌ Permanently removes tier
- ❌ Existing subscribers lose access
- ❌ Cannot be restored
- ❌ Requires contacting support
Best Practices
Proven strategies for creating successful membership tiers that convert and retain subscribers.
🎯 Start Simple
Begin with 2-3 tiers rather than overwhelming potential subscribers with too many options.
Tip: You can always add more tiers later as your community grows.
💰 Price for Value
Set prices that reflect the actual value provided. Be transparent about what members receive.
Tip: Consider surveying your community about what they'd be willing to pay for specific benefits.
📝 Clear Descriptions
Write detailed, benefit-focused descriptions that explain exactly what subscribers get.
Tip: Use bullet points to highlight key benefits and make the value proposition clear.
🔄 Regular Updates
Keep tier benefits fresh and engaging. Update descriptions and add new perks regularly.
Tip: Announce benefit updates to existing subscribers to show ongoing value.
🎨 Visual Hierarchy
Use role colors, names, and positioning to create a clear visual hierarchy of membership levels.
Tip: Higher-tier roles should have more distinctive colors and positioning in the role list.
📊 Monitor & Optimize
Track which tiers perform best and adjust pricing or benefits based on subscriber feedback and conversion rates.
Tip: A/B test different pricing or benefit combinations to optimize conversions.