Link in Bio
One link for your social media bios. Fans tap, pay, and join your Discord automatically.
Table of Contents
What is Link in Bio?
Your Link in Bio is a mobile-friendly payment page that you can share anywhere—TikTok, Instagram, Twitter, YouTube, or your website. When someone visits your link, they see your pricing options and can subscribe instantly.
🔗 The Problem
Your audience is on social media, but your paid community is on Discord. How do they find you and join?
✨ The Solution
One link that bridges the gap. Share pybt.me/yourname in your bio, and fans can subscribe directly.
How it works:
- Fan sees your link on TikTok/Instagram/etc.
- They tap it and see your payment page
- They pick a tier and pay with Stripe
- They log in with Discord
- PayBot automatically adds them to your server with the right role
Example Pages
Here's what your Link in Bio page can look like:
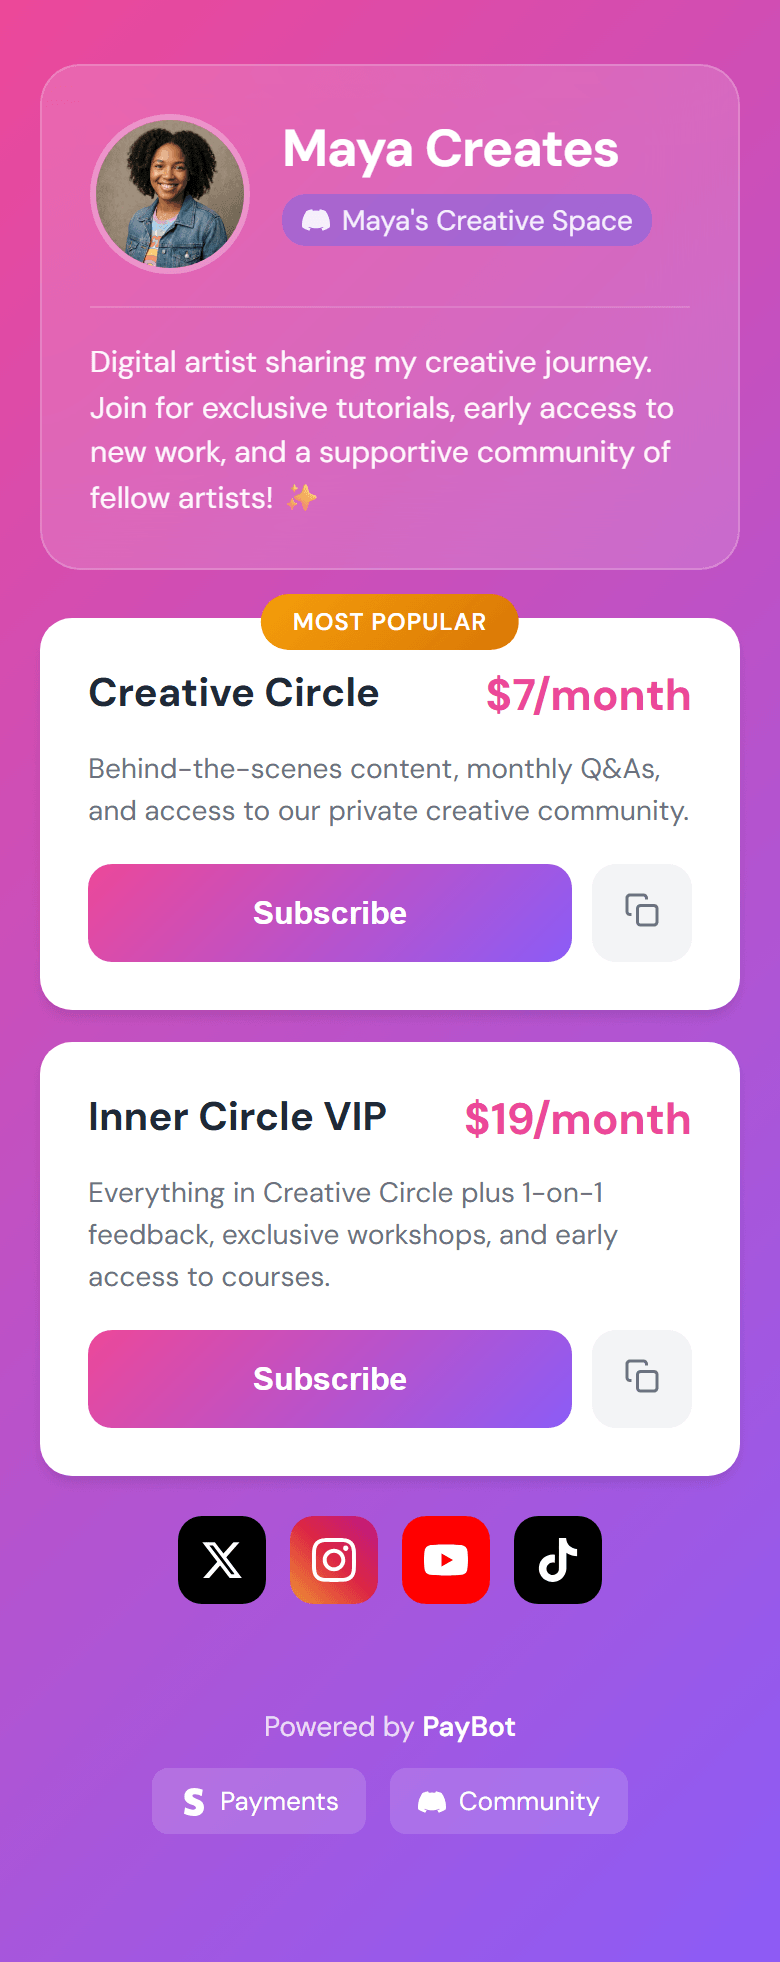
Light theme with Creator Compact header
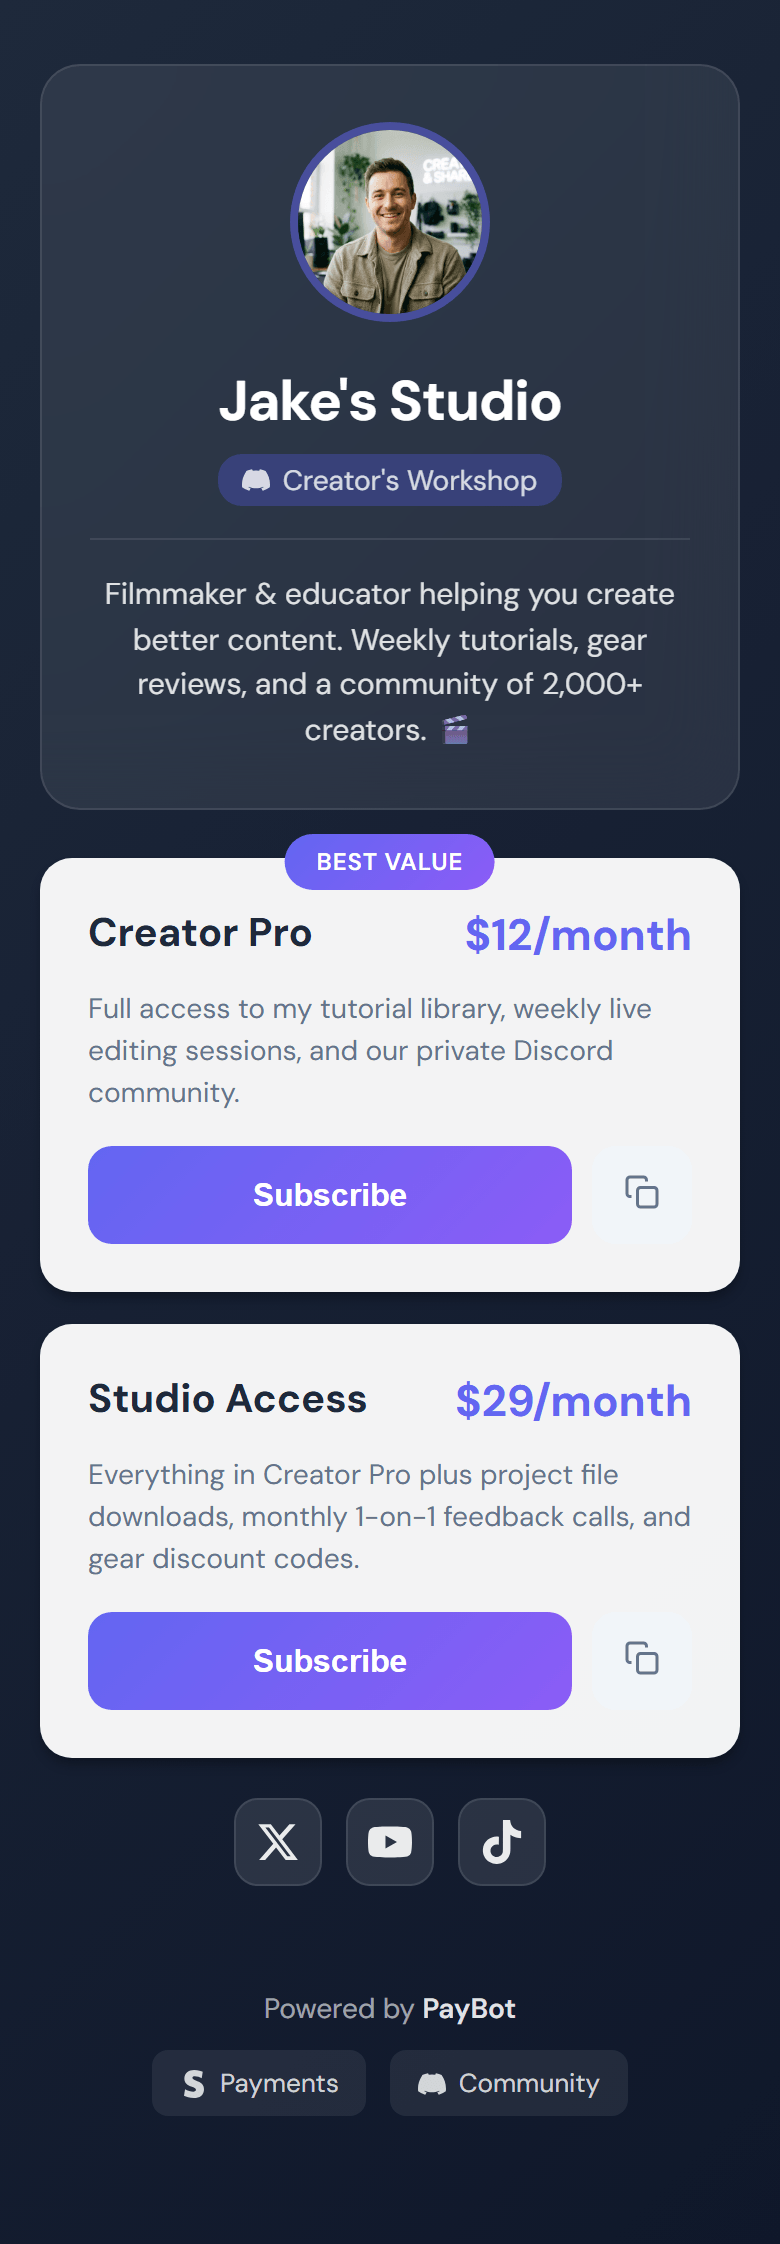
Dark theme with Creator Centered header
Getting Started
Set up your Link in Bio page in under 5 minutes.
Prerequisites: Complete the initial PayBot setup (connect Stripe) and create at least one pricing tier. Link in Bio is available on all plans, including Free.
Open Link in Bio Settings
Run /setup in your Discord server, then click "Link in Bio".
/setup → Link in BioYour Page is Already Live
PayBot automatically creates your page when you connect Stripe. You'll see your current content listed—your pricing tiers are already there!
Copy Your URL
Click "Copy URLs" to get your page link. You'll see two options:
- Full URL -
go.paybotapp.com/yourcode(best for websites) - Short URL -
pybt.me/yourcode(best for social bios)
Test It!
Click "View Portal" to see your page. It works on mobile and desktop.
Customize Your Header
Choose how you want to present yourself at the top of your page.
Header Styles
Click "Portal Settings" to access header customization. You have three options:
🖥️ Server Default
Shows your Discord server icon and name. Great for community-focused servers where the group identity matters more than an individual.
👤 Creator - Compact
Shows your profile picture on the left with your name beside it. Clean, modern look for individual creators.
🎯 Creator - Centered
Large centered profile picture with your name below. Premium feel, perfect for personal brands.
Setting Up a Creator Profile
When you select a creator style, you'll be asked for:
- Display Name - How you want your name shown (doesn't have to match Discord)
- Profile Picture - Choose from your X (Twitter) or Instagram profile
- Bio (optional) - A short tagline that appears below your name
Why use your social profile picture? Fans recognize you from your socials. Using the same photo creates instant trust.
Adding Content
Your page can include more than just pricing. Add context that helps visitors understand what they're getting.
Content Types
📝 Paragraph
Add text to explain what your community offers or share a personal message.
📌 Header
Section titles to organize your page (e.g., "Membership Options", "What You Get").
🔗 Link
Add links to your other content—YouTube channel, website, merch store, etc.
📱 Social Icons
Clickable icons for X, TikTok, Instagram, YouTube, Twitch, and Discord.
Adding Content
In Link in Bio view, use the "Add Content" dropdown
Select what you want to add (Paragraph, Header, Link, Social, or Pricing Option)
Fill in the details in the popup
Rearranging Content
Select any item from the content list, then use the action menu to:
- Move Up / Move Down - Adjust position one step at a time
- Move to Top / Move to Bottom - Jump to the beginning or end
- Edit - Change the content (text blocks only)
- Remove from Portal - Hide from your page (doesn't delete anything)
Customizing Pricing Display
Want different text on your page than what's in Stripe? Select a pricing tier and choose "Edit Display" to:
- Override the tier name shown on your page
- Override the description shown on your page
This only affects how it looks on your Link in Bio page—Stripe and your actual tier settings stay the same.
Tier Badges
Highlight your best option with a badge like "Most Popular" or "Best Value". Select a pricing tier and choose "Set Badge".
Custom URLs & Short URLs
Make your link memorable and professional.
Two URL Options
Full URL
go.paybotapp.com/yournameBest for websites, emails, and anywhere you want PayBot branding visible. Builds trust.
Short URL
pybt.me/yournameBest for social bios with character limits (TikTok, Twitter). Saves space.
Setting a Custom URL
Replace the random code with your own memorable slug:
Go to Link in Bio → Portal Settings
Click "Custom URL"
Enter your desired slug (e.g., grimmgreen, yourname)
Old links never break! If you change your custom URL later, old links automatically redirect to your new URL.
Slug Requirements
- 3-30 characters
- Lowercase letters, numbers, and hyphens only
- Can't start or end with a hyphen
- Must be unique (not used by another server)
Analytics
See exactly how your Link in Bio page is performing with built-in funnel analytics.
Access Analytics: Run /setup → Link in Bio Portal → Analytics

What You Can Track
📊 Funnel Metrics
- Page Views - Total visits and unique visitors
- Tier Clicks - Which pricing options get attention
- OAuth - How many complete Discord login
- Checkout Started - Who reaches Stripe checkout
- Purchases - Actual conversions
🔗 Link Clicks
- Track clicks on external links you've added
- See which social links drive engagement
- Identify what content resonates with visitors
Per-Tier Breakdown
See funnel stats for each individual tier. Compare which tiers convert best and identify where visitors drop off.
Time Range Options
View your analytics for the last 7, 30, or 90 days. Use shorter ranges to measure campaign impact, longer ranges to see growth trends.
Trend Charts
Select any tier to see a line chart showing daily performance over your selected time period. Great for spotting patterns and measuring the impact of promotions.
Smart Deduplication: Analytics count real visits, not inflated numbers. Page refreshes and back-button clicks don't count as extra views.
Pro Tips
🎯 Keep It Simple
Don't overwhelm visitors with too many options. 2-3 pricing tiers is usually ideal. Make the best option obvious with a "Most Popular" badge.
📸 Use a Recognizable Photo
If you're using a creator header style, use the same profile picture from your socials. Fans recognize you instantly.
✏️ Write Benefit-Focused Descriptions
Instead of "Access to members channel", write "Chat directly with me and other superfans". Focus on what they GET, not what they're buying.
📊 Test on Mobile First
Most of your traffic will be from phones. Always check how your page looks on mobile before sharing.